 How to Replace Ceramic Tile on Floor – Here at Appleby, we don’t fabricate or install stone or tile, but we do repairs. This means we replace tiles, fix mortar, caulk, replace shower sweeps, fix holes in Travertine and generally make your home more clean and beautiful. Here’s a very scaled down set of instructions with pictures showing how to replace broken tiles in a floor.
How to Replace Ceramic Tile on Floor
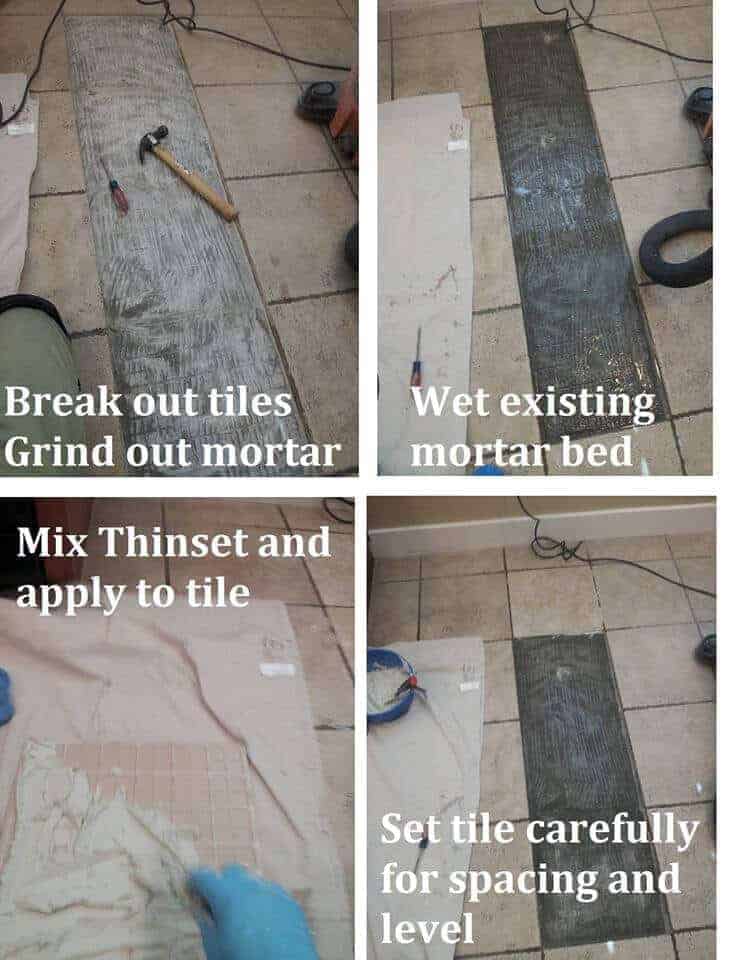
Step 1: Break out the tiles. The trick is not to break the OTHER tiles in the proximity. If the tiles are spaced less than 1/8″ or are a softer material, (i.e marble) I will usually grind into the grout lines with a Dremmel drill or grinder first. In this case, it’s okay to take a hammer to the offending cracked or damaged tiles and carefully remove them. Once this is done, grind down the mortar or Thinset allowing room for your new mud (Thinset). This can get dusty so have a vacuum ready.
Step 2: Wet the mortar bed. This is super important for a good tile-to-mortar bond. Allowing the water to penetrate the existing mortar will keep it from sucking the moisture out the Thinset.
Step 3: Mix your Thinset. Thinset is a thinner, more sticky mortar made of fine sand and a water-retaining agent. It should be mixed to the consistency of thick cake batter. Most commonly applied with a notched trowel, I will often custom apply it with a putty knife to the back of the tile depending on what the mortar bed looks like, i.e. if there are deep holes or high spots I will try to compliment that with the backside application.
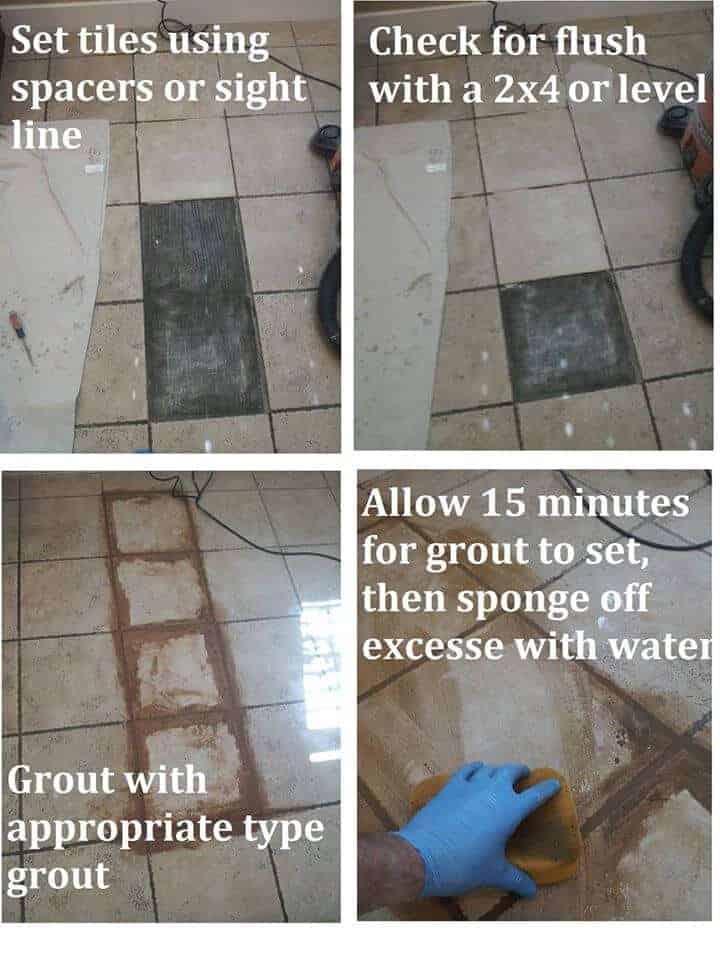
Step 4: This is what you’ve been waiting for–the glory of strapping on the kneepads! Rejoice! You are now going to set the tile, adjusting it for flush (trying to get it at the same height as the other tiles) and either using spacers or sighting it by eye. On a flat surface, you can sometimes get away without spacers. If gravity is involved (vertical or slanted applications) you really want to use spacers.
Step 5: Clean out any Thinset between tiles. This will save you a lot of work later. Once the Thinset is set (usually a minimum of half an hour) you can apply the grout into the voids. For less than 1/8″, use non-sanded grout. For more than 1/8″, use sanded grout. Exactly 1/8″, you can use either!
Step 6: Wait for the grout to set, about 15 minutes or so. After grout has firmed up a bit, use a sponge and bucket of clean water to wipe off the excess grout. Do this at a 45 degree angle to the grout lines so as not to pull out the grout.
Step 7: Congratulate yourself. If you feel like dancing, try to include your significant other and don’t dance on the tiles. You are awesome.
We hope this blog helps yo do the repairs you want to do in your home. If you need help or would like us to tackle your project, give us a call!!!
Thanks.

Les